Introduction
Virtualization is a crucial tool for security researchers and developers, enabling them to run multiple operating systems simultaneously on a single machine. This capability is essential for testing, analyzing software, and conducting security research across different environments. However, running Intel-based Linux virtual machines (VMs) on Apple Silicon (ARM-based) Macs presents unique challenges. In this article, we'll explore two powerful solutions: building a custom VM using Apple's virtualization framework and leveraging OrbStack for efficient virtualization.
⚠️ Disclaimer ⚠️
This article intentionally avoids discussing common solutions like UTM, VMWare, or paid alternatives such as Parallels. Instead, we'll focus on two specific approaches: utilizing Apple's virtualization framework to create a custom VM, and implementing OrbStack, a powerful tool recently introduced to me by my colleague Mario, which enables quick deployment of Intel-based Linux VMs from the command line on macOS.
Context
Apple Silicon chips (M1, M2, etc.) are based on ARM architecture, which introduces a fundamental compatibility challenge: they cannot natively run Intel-based operating systems. This limitation significantly impacts security researchers and developers who rely on Intel-based Linux distributions for their work. However, with the right tools and techniques, we can effectively bridge this architectural gap.
When I first got my M1 MacBook three years ago as a young security researcher, I immediately faced the challenge of running my Linux VMs. At that time, options for running Linux VMs on ARM-based macOS were limited and often unreliable. However, the landscape has evolved significantly, with new tools and techniques emerging that enable security researchers to run Linux VMs more effectively on Apple Silicon Macs.
A significant breakthrough came during WWDC2022, where Apple introduced new tools and documentation for running VMs on macOS ARM. This development has created new opportunities for security researchers looking to run Linux VMs on their Apple Silicon MacBooks.
Setting Up the Custom VM with Apple's Virtualization Framework
Apple's Virtualization framework provides developers with a robust toolkit for creating and managing virtual machines on macOS. It offers a high-level API that simplifies VM management and supports both Intel and ARM architectures. Through Rosetta integration, it enables running and compiling Intel binaries inside the VM.
For those eager to get started, you can find the pre-configured VM ready for use in this repository: REPO
Building the VM
The repository contains an Xcode project that sets up an Ubuntu Server with minimal configuration. While the core code is based on Apple's reference implementation, I've enhanced it with custom optimizations and Rosetta integration to support Intel binary execution, debugging, and compilation.
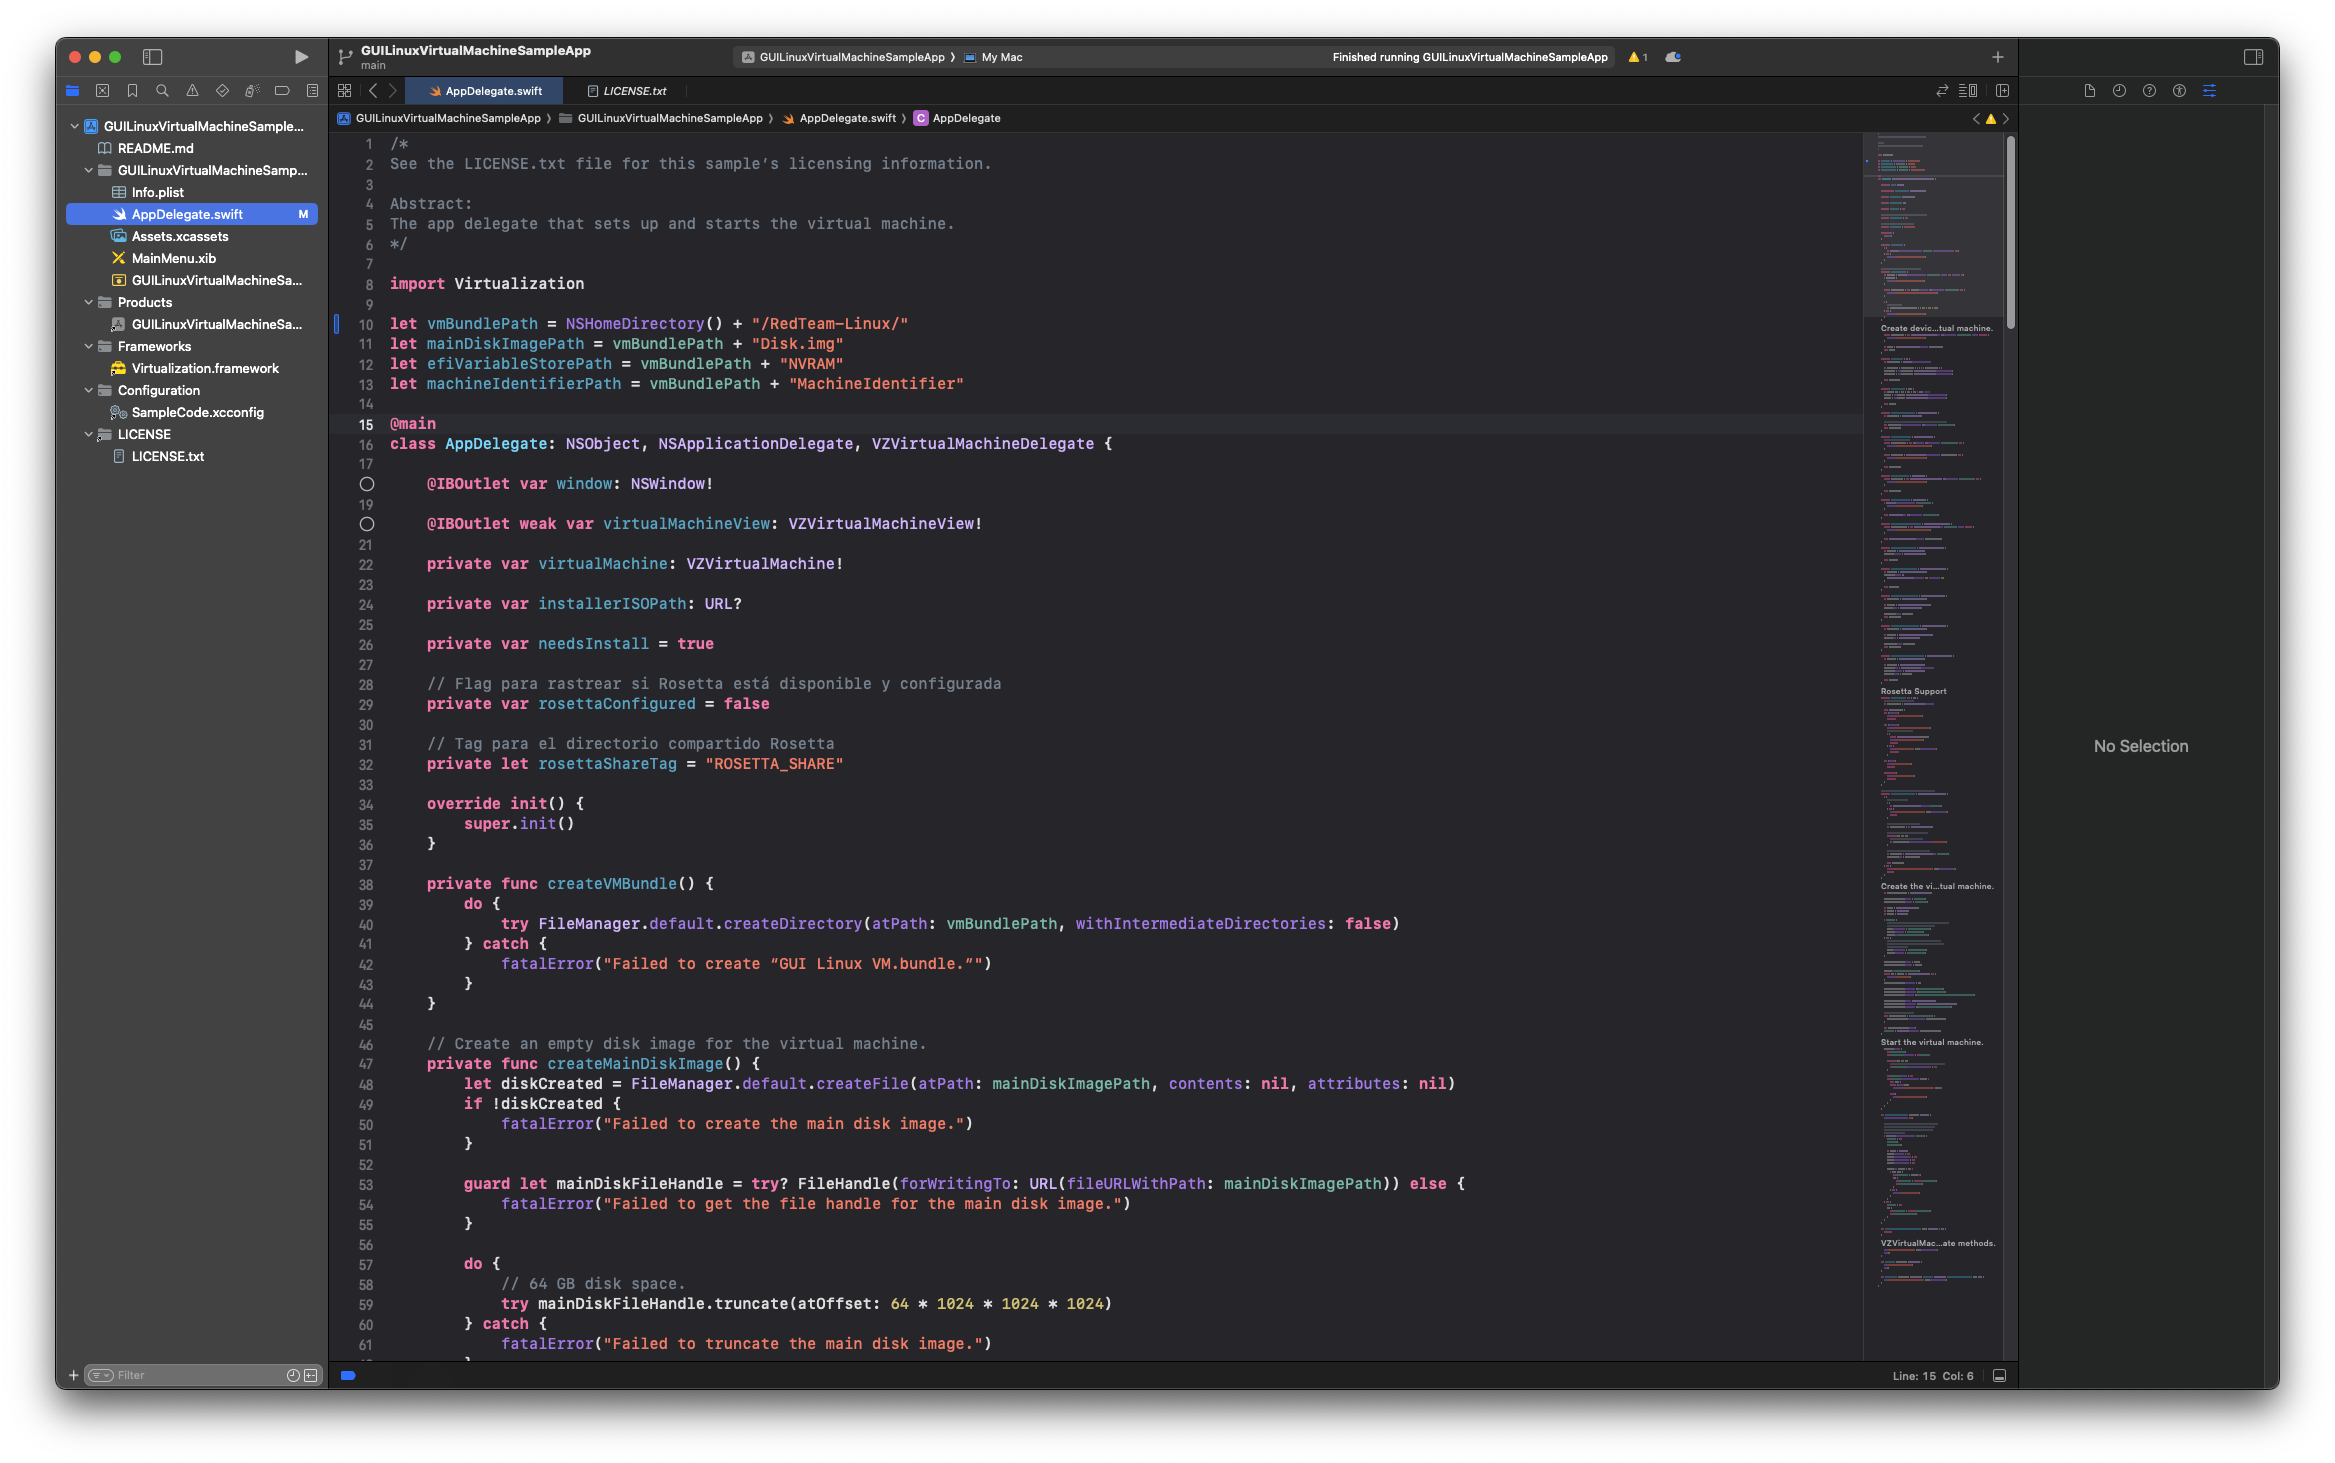
Click to expand
xcode
Note: This implementation uses Ubuntu 22.04 Server as it runs on kernel 5.*, which is compatible with Rosetta. For newer versions like Ubuntu 24.10, be aware that kernel versions 6.11 and above have a known bug affecting Rosetta compatibility. If you need to use Ubuntu 24.10, downgrade the kernel to version 6.10 or earlier. For more details, see this discussion: https://github.com/utmapp/UTM/discussions/6799
After cloning the Xcode repository, simply run the project, and a window will open (@IBOutlet var window: NSWindow!) where you can select your Ubuntu Server ISO.
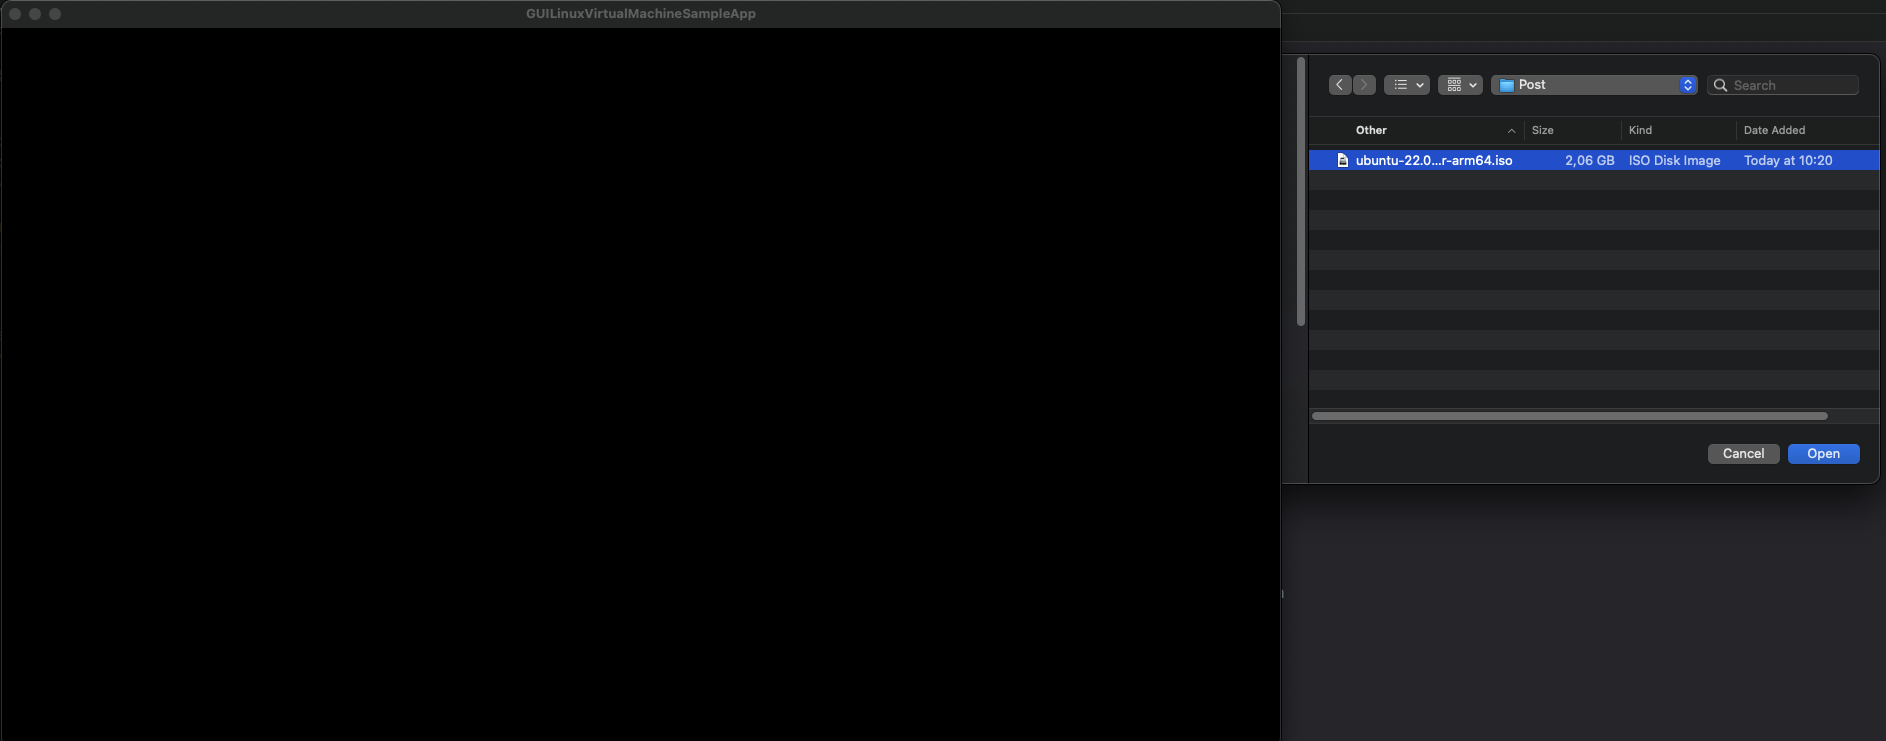
Click to expand
iso
The installation will then proceed.
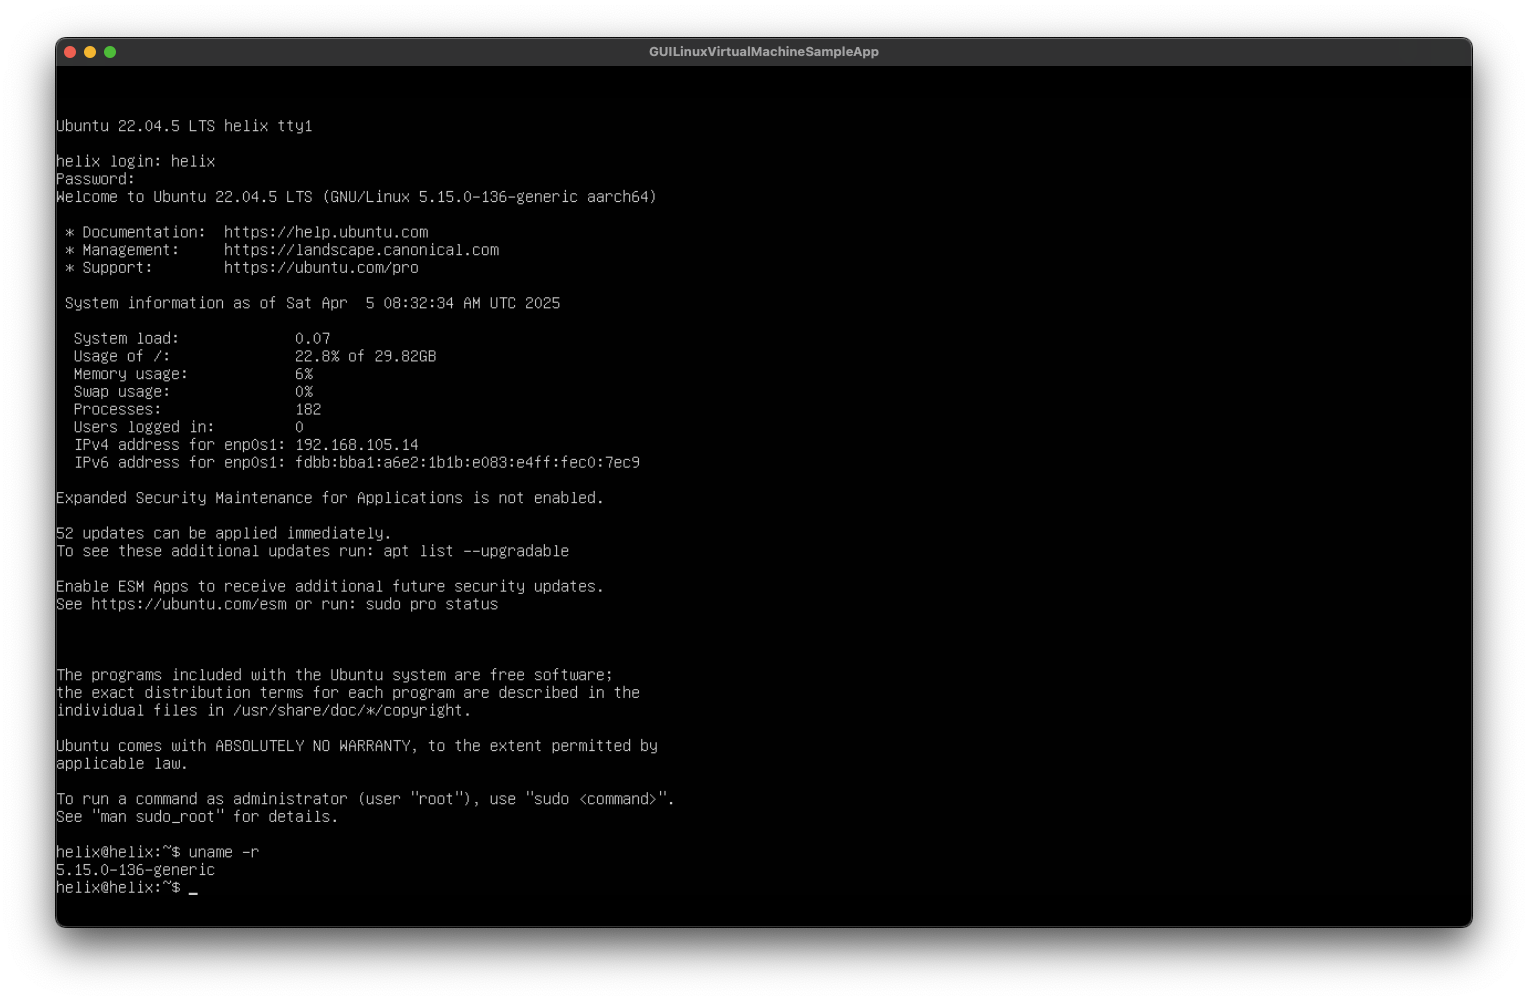
Click to expand
server
At this point, you have two options:
- Use the VM without GUI and set up Rosetta for Intel binary support
- Install a Desktop Environment with GUI and Rosetta support (Recommended for most users, as the alternative option is better suited for quick, headless VM deployments)
For a GUI setup, simply run these commands:
BASH$ sudo apt update $ sudo apt install -y ubuntu-desktop $ sudo reboot
After reboot, you'll have a fully functional desktop environment.
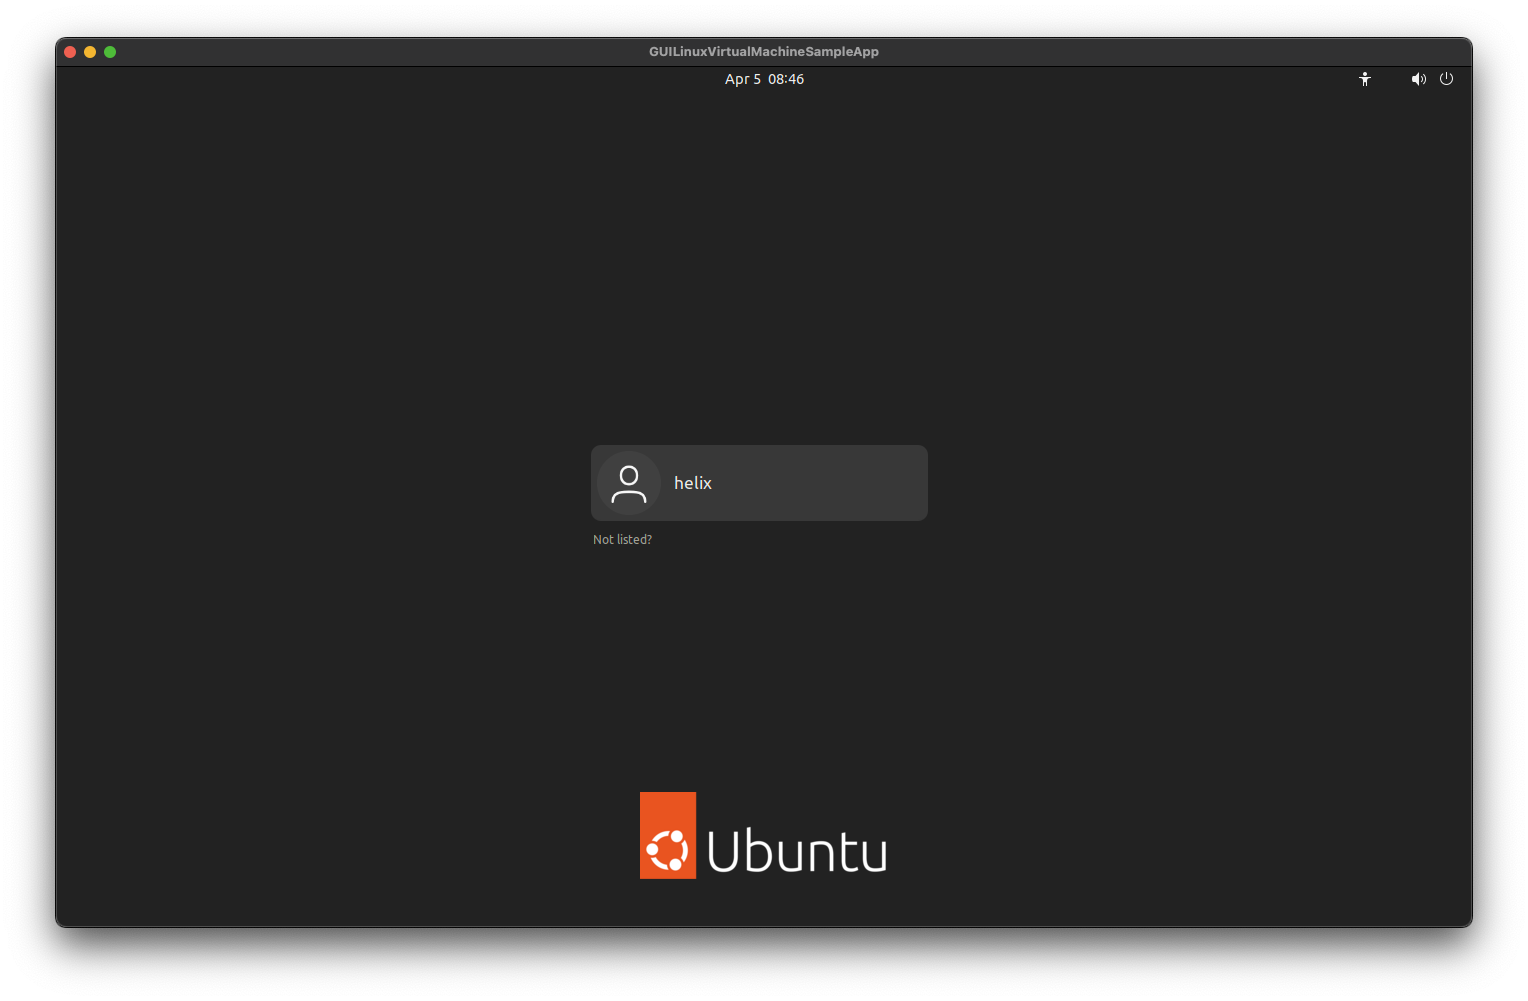
Click to expand
desktop
Mounting Rosetta
With the VM running, the next step is integrating Rosetta to enable Intel binary execution. While there's a script available for automation, here are the essential steps:
- Install binfmt support:
BASH# For Debian/Ubuntu-based distributions $ sudo apt-get install binfmt-support # For Red Hat/Fedora-based distributions $ sudo dnf install binfmt-support
- Mount the Rosetta shared filesystem:
BASH# Create a mount point $ mkdir /tmp/rosetta # Mount the VirtioFS filesystem $ sudo mount -t virtiofs ROSETTA_SHARE /tmp/rosetta
- Register Rosetta as x86_64 binary interpreter:
BASH$ sudo /usr/sbin/update-binfmts --install rosetta /tmp/rosetta/rosetta \ --magic "\x7fELF\x02\x01\x01\x00\x00\x00\x00\x00\x00\x00\x00\x00\x02\x00\x3e\x00" \ --mask "\xff\xff\xff\xff\xff\xfe\xfe\x00\xff\xff\xff\xff\xff\xff\xff\xff\xfe\xff\xff\xff" \ --credentials yes --preserve yes --fix-binary yes
- For dynamically linked binaries, install necessary shared libraries:
BASH# Setup for common application dependencies $ sudo dpkg --add-architecture amd64 $ cat > /etc/apt/sources.list.d/amd64.list <<EOF deb [arch=amd64] http://archive.ubuntu.com/ubuntu/ jammy main restricted universe multiverse deb [arch=amd64] http://archive.ubuntu.com/ubuntu/ jammy-updates main restricted universe multiverse deb [arch=amd64] http://archive.ubuntu.com/ubuntu/ jammy-security main restricted universe multiverse deb [arch=amd64] http://archive.ubuntu.com/ubuntu/ jammy-backports main restricted universe multiverse EOF $ sudo apt update $ sudo apt-get install libc6:amd64 libstdc++6:amd64
- For permanent setup, add this line to /etc/fstab:
BASHROSETTA_SHARE /tmp/rosetta virtiofs defaults 0 0
After mounting Rossetta, you can run Intel binaries inside the VM, compile them and even debug them using tools like GDB :)
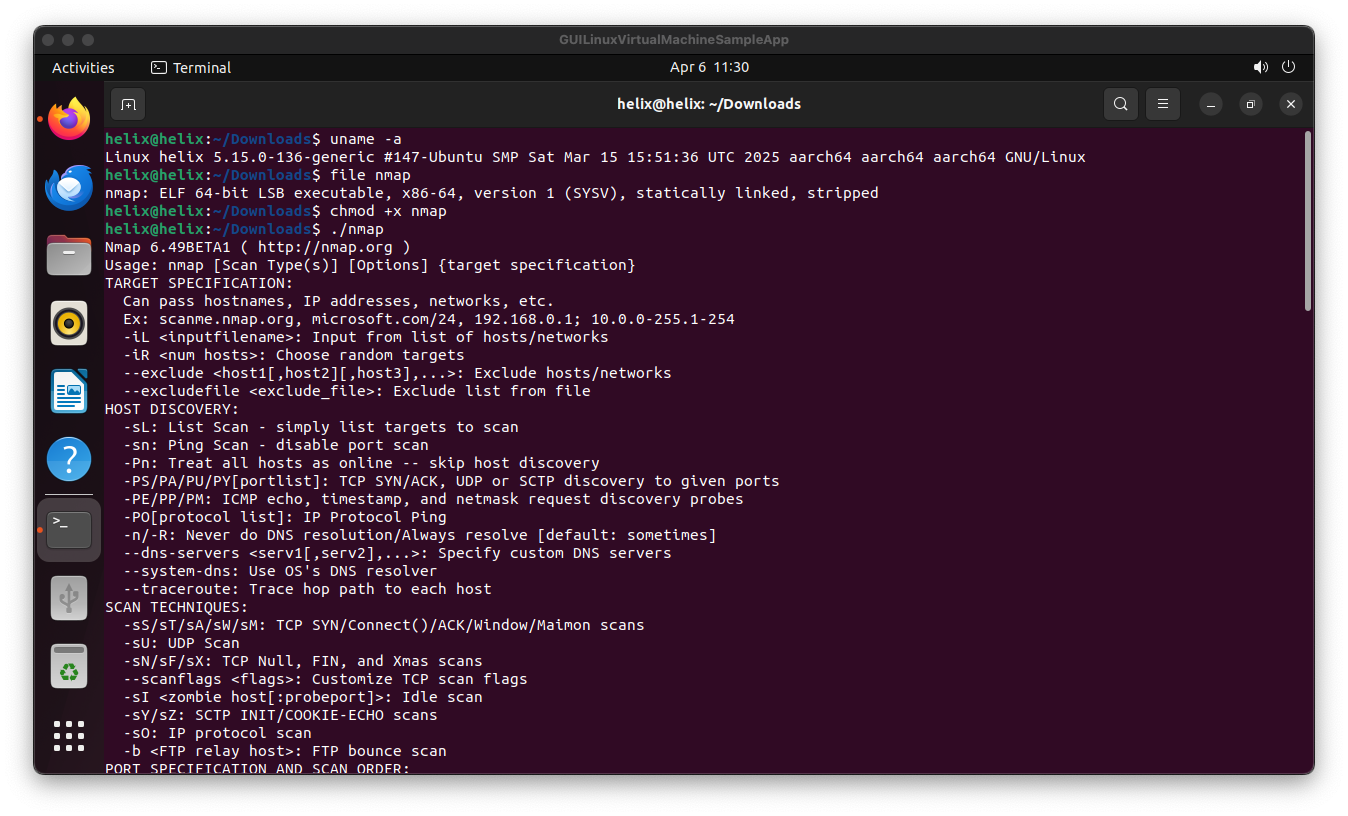
Click to expand
nmap
Note: I am currently working on automating this process in case someone wants to have a VM with GUI and Rosetta preinstalled. I am also still looking for a way to make snapshots of the VM and be able to backup it in case it breaks. If anyone has any ideas or suggestions, please feel free to contact me <3.
OrbStack
This technology was taught to me by my co-worker Mario, so all credits to him :DLinkedIn Profile: Mario Ballano
OrbStack stands out as an exceptional tool that not only enables Intel-based Linux VM deployment but also provides seamless management of ARM VMs, Docker containers, images, volumes, and Kubernetes pods and services.
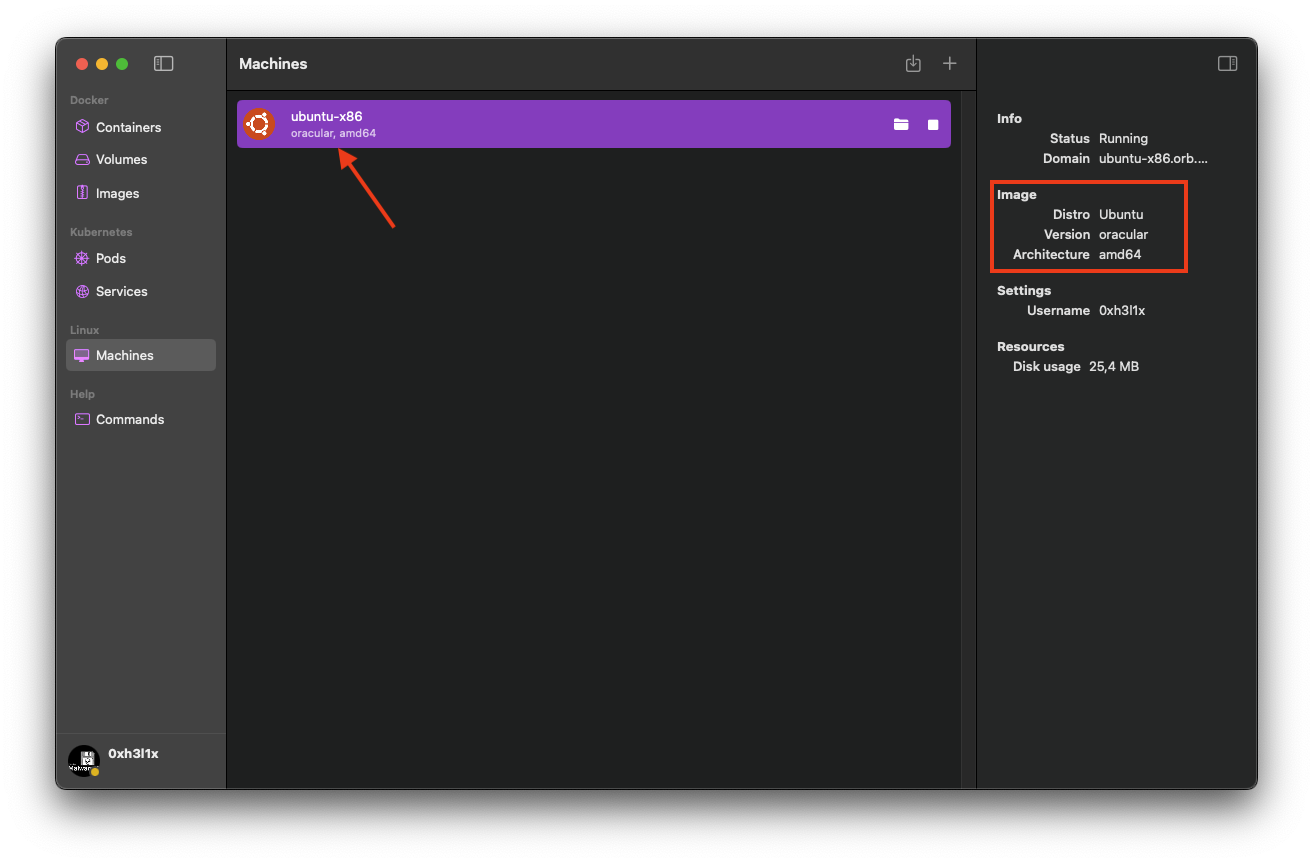
Click to expand
orbstack
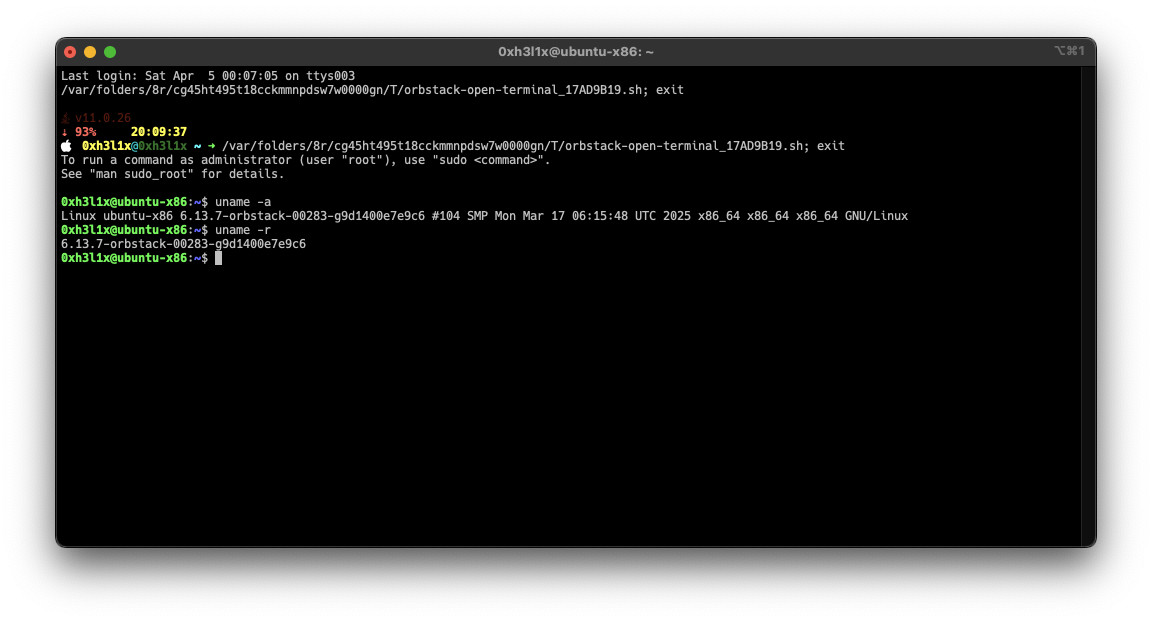
Click to expand
terminal
While OrbStack's documentation provides comprehensive details, here are the key features that make it exceptional:
- Minimal performance impact through on-demand CPU and memory utilization
- Direct SSH integration enabling VSCode connectivity, MCP debugging, log extraction, firmware analysis, and AI-assisted documentation
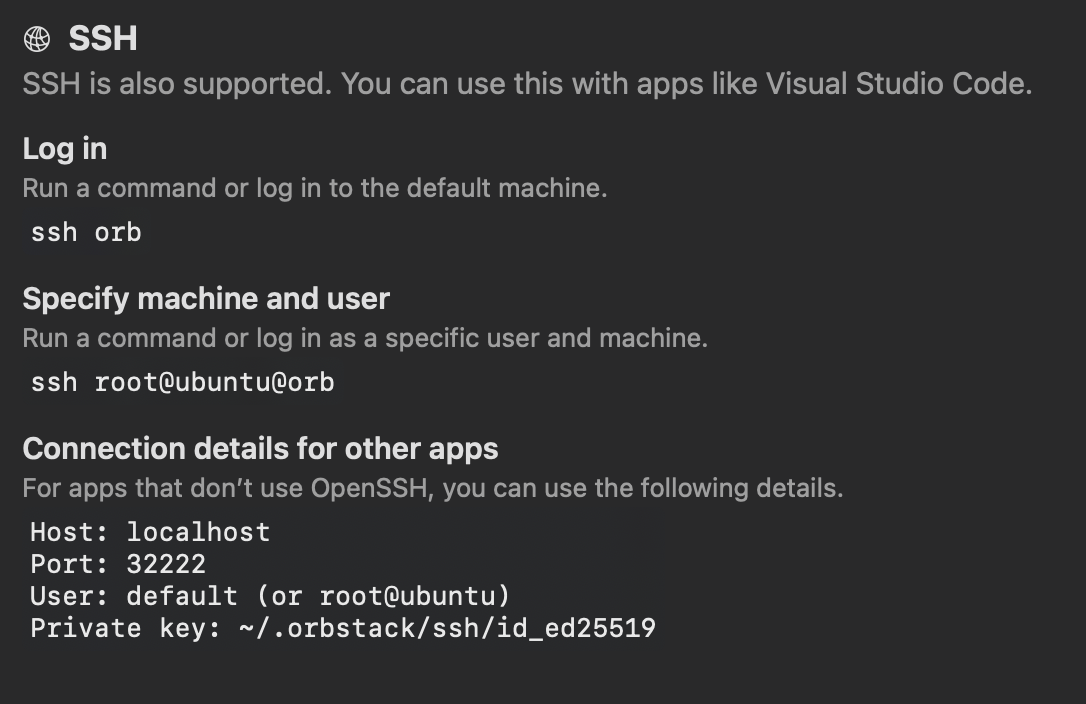 Click to expand
ssh
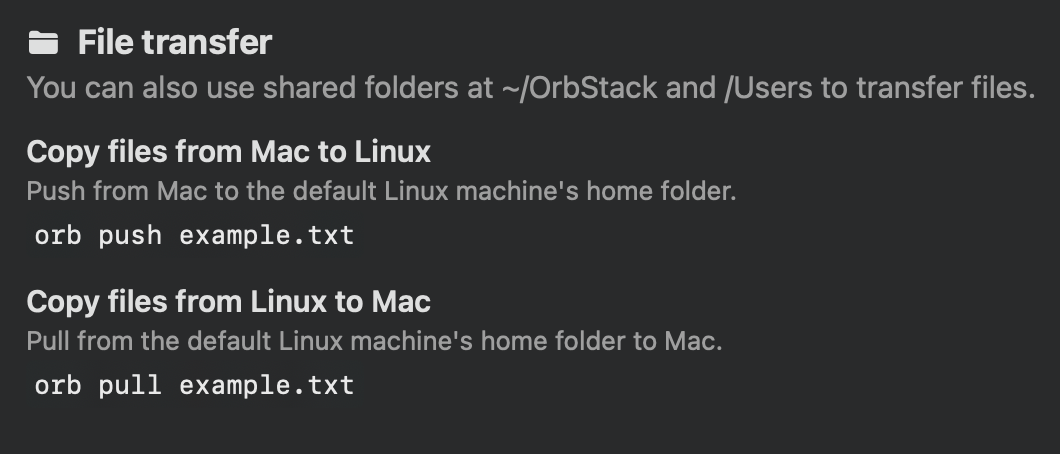
- Native macOS filesystem integration allowing direct and efficient file transfers (a significant improvement over most macOS virtualization solutions)
 Click to expand
filetransfer
- Ability to execute macOS commands from within Linux
 Click to expand
mac
Conclusion
Mastering virtualization is not just a technical convenience—it's a fundamental skill for modern cybersecurity professionals. Through the solutions presented in this article—Apple's Virtualization framework and OrbStack—security researchers using Apple Silicon Macs can now bridge the architecture gap and run Intel-based Linux VMs effectively. Here's why this matters:
Security Testing and Research
- Isolated Environments: Virtual machines provide safe, isolated environments for analyzing malware, testing exploits, and conducting security research without risking your main system.
- Multiple Configurations: Security professionals can quickly spin up different OS versions and configurations to test vulnerabilities across various environments.
- Snapshot and Rollback: The ability to take snapshots and roll back changes is crucial when testing security patches or analyzing system modifications.
Tool Compatibility
- Legacy Tools: Many essential security tools are compiled for Intel architectures. Through proper virtualization, these tools remain accessible on modern ARM-based systems.
- Cross-Platform Testing: Security researchers can verify vulnerabilities across different architectures and ensure their findings are reproducible.
- Development and Debugging: The integration with development tools like VSCode and debugging capabilities ensures a seamless workflow for security tool development.
Practical Benefits
- Resource Efficiency: Both solutions presented offer optimal resource utilization, ensuring your security work doesn't compromise system performance.
- Quick Recovery: If a security test goes wrong or a system becomes compromised, you can quickly restore to a clean state.
- Documentation and Collaboration: The ability to share VM configurations and environments facilitates team collaboration and knowledge sharing.
Future-Proofing
As the cybersecurity landscape continues to evolve, the ability to run different architectures and environments becomes increasingly important. The solutions presented here not only solve current compatibility challenges but also provide a foundation for future security research needs.
Whether you're conducting penetration testing, malware analysis, or developing security tools, having a reliable virtualization setup is essential. The methods described in this article ensure that security professionals using Apple Silicon Macs can maintain their workflow efficiency while leveraging the full power of their hardware.
Remember: In cybersecurity, your testing environment is as important as your tools. Investing time in setting up proper virtualization will pay dividends in your security research and development work.